
Building 3D 2048 game with Vue, Three.js, and TypeScript (part 2)
This series has been discontinued without a proper ending. For anyone affected and seeking guidance for the related topic, contact me through Twitter DM, my Facebook Page, or email, and we should work something out!
So, we continue making our 3D 2048 game (after >month break - sorry)! For those of you who don’t know what I’m talking about - I advice reading the previous article, as there’s not much time for me to explain everything once again. That’s because, today, we’ll be laying the foundation for probably the most vital part of the game - the board! We’ll do the important logic-related things today, and leave aesthetics & other potential “less intrusive bugs” fixes for later. Also, as this part will involve a lot of code, I’ll only focus on some fragments of the code. You can find the complete code-base in the GitHub repo. Without further ado, let’s get to work!
The easy part
Before we get to the complex stuff, let’s make some preparations first. In the meantime between this and the previous article from the series, I’ve done some little changes to configuration files, including style changes and things like that, which doesn’t matter that much. The only change that I’d like to mention here is the addition of Anime.js library to our dependencies. This will be very useful later when we’ll be adding some custom animations to our board.
yarn add animejsTo the code then! As I said, we won’t be focusing on details today! Instead, we only want our board to work and be semi-usable.
Let’s start by creating 2 new files in our src folder - materials.ts and geometries.ts. Both of them will be housing our Three.js materials and geometries respectively. Such a solution isn’t only good for the overall structure of our code but also allows us to reuse these assets much easier.
// materials.ts

import * as THREE from 'three';

export const boardMaterial = new THREE.MeshToonMaterial({
  color: '#212121',
  flatShading: true,
});
export const tileMaterial = new THREE.MeshToonMaterial({
  color: '#424242',
  flatShading: true,
});
export const numMaterial = new THREE.MeshToonMaterial({
  color: '#ef6C00',
  flatShading: true,
});
With the code above, we create 3 reusable materials - instances of MeshToonMaterial. Keep in mind that these are used mostly for development purposes. I added some flat-shaded coloring to make them look better for the eyes. Know that using such materials require you to add some lights to your scene! I’ll show how to do it later, but if you want to skip this step (it’ll most likely be changed later anyway), you can use MeshNormalMaterial for now.
// geometries.ts

import * as THREE from 'three';
import roboto from './assets/roboto.json';

interface NumGeometryCache {
  [key: string]: THREE.BufferGeometry;
}

const font = new THREE.FontLoader().parse(roboto);

const cache: NumGeometryCache = {};

export function generateBoardGeometry(boardSize: number) {
  return new THREE.BoxBufferGeometry(boardSize, 0.2, boardSize);
}

export function generateEdgeGeometry(boardSize: number, marginSize: number) {
  return new THREE.BoxBufferGeometry(
      boardSize + 4 * marginSize,
      2 * marginSize,
      2 * marginSize
  );
}

export function generateNumGeometry(num: number) {
  if (!cache[num]) {
    cache[num] = new THREE.TextBufferGeometry(num.toString(), {
      font,
      size: 0.4,
      height: 0.4,
    })
      .center()
      .rotateX(Math.PI / 2)
      .rotateY(Math.PI)
      .rotateZ(Math.PI);
  }
  return cache[num];
}

export const tileGeometry = new THREE.BoxBufferGeometry(1, 0.2, 1);
Our geometries.ts file is a bit more complicated. Here, we need to create some functions, for them to generate respective geometries. Doing this for both board and its edges (more about that later) only requires the use of some arguments and simple BoxBufferGeometry for performance reasons.
We have to do the same for individual tiles also. It’s here that reusing and caching our geometries matters the most - we’ll be creating and removing a lot of tiles over the course of a single game session. While the tile’s “base” is as simple as a single variable could be, we’d like our tiles to also have their respective values (like 2, 4, 8…) assigned to them. That’s where the generateNumGeometry() comes in. Inside it, we create and cache our TextBufferGeometry instances. Such type of geometry requires some “special treatment” when compared to the BoxBufferGeometry that we’ve used before. First, we have to load an external .json file that houses our font-of-choice, to Three.js-readable format. There’s a special tool for that available here. For our case, I used the standard Roboto (Bold) font to match our future Material Design UI.
Then, we need to load the font with FontLoader. But, instead of using standard .load() method, we simply import our JSON font file, and use .parse(). It’s a much simpler solution. Instead of messing with the async loading, our JSON data will be included directly inside our code-base. Also, as we only need such font for digits only, so I advise you to limit the set of generated characters inside the generator, to match that, for smaller, more performant results.
After all font-related stuff is done, we create our geometry and apply a few transformations to it, just so it’s orientated in the correct direction, right from the start.
Raycaster
To make the board interactive, we have to somehow detect user’s actions. In WebGL (as there’s no such thing as .onclick), we have to use raycasting. I won’t go too much into detail here. Basically, Three.js provides raycasting functionality to us out-of-the-box, so that we can detect objects that intersect with the cast ray, any time we want.
Even though Three.js Raycaster handles much of the dirty work, it still requires us to actually do something. For that, I created the raycaster.ts file, where we’ll create a nice wrapper for our particular use-case. Let me show you some of its most important parts.
// raycaster.ts

// ...
private raycast(
    event: PointerEvent,
    object3D: THREE.Object3D,
    handler: (event: PointerEvent) => void,
) {
    this.mouse.x = (event.clientX / this.element.clientWidth) * 2 - 1;
    this.mouse.y = -(event.clientY / this.element.clientHeight) * 2 + 1;
    this.raycaster.setFromCamera(this.mouse, this.camera);

    const intersection = this.raycaster.intersectObjects([object3D])[0];
    if (intersection) {
        handler(event);
    }
}
// ...
Inside our wrapper class, we create a “private” method .raycast(), which uses Three.js Raycaster instance to check for the intersection with provided set of objects. We follow the most general pattern here - we set our .mouse Vector2 instance with correctly projected coordinates, use that to configure our Raycaster, check for intersections, and execute specified handler for the top-intersected object.
.raycast() is used by our “public” .on() and .off() methods, mirroring usual, easy-to-use DOM-like event handling. Let’s see how .on() works.
// raycaster.ts

// ...
on(
    eventName: PointerEventNames,
    object3D: THREE.Object3D,
    handler: (event: PointerEvent) => void,
  ) {
    if (!this.listeners[eventName]) this.listeners[eventName] = {};
    const listener = (event: PointerEvent) => this.raycast(
        event, object3D, handler
    );
    const listeners = this.listeners[eventName];
    const hashedHandler = hashFunc(handler);
    listeners![hashedHandler] = listener;
    this.element.addEventListener(eventName, listener);
    }
// ...
With the use of TypeScript, we limit allowed events to [PointerEvent](https://developer.mozilla.org/en-US/docs/Web/API/Pointer_events)s only, to ensure that listeners will work with various input devices. Another important detail here is how we “save” our listener functions. For .off() to work, we need to have access to the original listener. That’s why, in .on(), we save the listener to our .listeners object, using “hashed” handler function string as a key.
// raycaster.ts

function hashFunc(func: Function) {
  return func
    .toString()
    .split('')
    .reduce((a, b) => {
      a = (a << 5) - a + b.charCodeAt(0);
      return a & a;
    }, 0);
}

// ...
Scene modifications
With the Raycaster class ready to go, we have to somehow integrate it with the rest of the code-base. I decided to put it right inside the Scene component, together with some other small changes…
// Scene.vue

// ...
export default class Scene extends Vue {
  private hemisphereLight = new THREE.HemisphereLight(
      0xaaaaaa,
      0x000000,
      0.9
  );

  private directionalLight = new THREE.DirectionalLight(0xffffff, 0.9);

  private ambientLight = new THREE.AmbientLight(0xdc8874, 0.5);

  private renderer = new THREE.WebGLRenderer({ alpha: true });

  private camera!: THREE.PerspectiveCamera;

  private controls!: OrbitControls;

  raycaster!: Raycaster;

  scene = new THREE.Scene();

  private animate() {
    this.renderer.render(this.scene, this.camera);
    this.controls.update();
    requestAnimationFrame(this.animate);
  }
}
I moved the animate() function definition to be a class member itself, added a few lights for MeshToonMaterials to be even visible, and pass the alpha property to the renderer so that there will be no black background. Other than that, I prepared a “public” member for our Raycaster instance. You should notice by now that our Vue + TypeScript requires o non-null assertion operator, in order to set some properties inside mounted() hook, where DOM element is already, well… mounted.
// Scene.vue

// ...
mounted() {
    const el = this.$refs.scene as Element;
    const aspect = el.clientWidth / el.clientHeight;

    this.camera = new THREE.PerspectiveCamera(75, aspect, 0.1, 1000);
    this.controls = new OrbitControls(
        this.camera,
        this.renderer.domElement);
    this.raycaster = new Raycaster(this.camera, this.renderer.domElement);

    this.renderer.setSize(el.clientWidth, el.clientHeight);

    this.scene.add(
      this.ambientLight,
      this.hemisphereLight,
      this.directionalLight,
    );
    this.directionalLight.position.set(150, 350, 350);

    el.appendChild(this.renderer.domElement);
    this.controls.enablePan = false;
    this.camera.position.z = 5;

    this.animate();
}
  // ...
The second new thing here that I haven’t talked about yet is the addition of OrbitControls! This allows us to better navigate and inspect our scene. The setup is simple. The only issue is that OrbitControls is located in Three.js examples folder which isn’t included directly inside its code-base. Of course, we could just import the right file, but this would make TypeScript very angry. That’s why I’m really happy that Three.js developers, together with migrating their .d.ts typings to the library itself (rather than external DefinitelyTyped collection), added the jsm folder to the examples, which ports at least some of examples-originated code to ESM-compatible form, together with TS typings! That’s why you can now use OrbitControls with one, simple line.
import { OrbitControls } from 'three/examples/jsm/controls/OrbitControls';A word on grid handling…
The hardest part of probably any board-based game is grid handling. Here, in 2048, we need to ensure that tiles are positioned correctly, their values are accurate, and that moving one tile result in moving the others as well (either in a row or a column).
To handle the actual logic without bloating any Vue component, I moved it to 2 separate files - grid.ts and manager.ts.
Inside the grid.ts, we define a Grid class that has a form of a simple wrapper around our actual array of tiles, with a couple of additional functionalities.
// grid.ts

export default class Grid {
  private tiles: TilePrimitive[] = [];

  private size: number;

  constructor(size: number) {
    this.size = size;
  }

  eachTile(func: (tile: TilePrimitive) => void): void;

  eachRow(func: (tiles: TilePrimitive[]) => void): void;

  eachColumn(func: (tiles: TilePrimitive[]) => void): void;

  resetTiles(): void;

  removeTile(tile: TilePrimitive): void;

  addTile(tile: TilePrimitive): void;

  setTileX(tile: TilePrimitive, x: number): void;

  setTileY(tile: TilePrimitive, y: number):void;

  isMergable(tile: TilePrimitive): boolean;

  isPlayable(): boolean;

  hasChanged(): boolean;

  merge(baseTile: TilePrimitive, mergedTile: TilePrimitive): void;

  getEmpty(): { x: number; y: number }[];

  getTiles(): TilePrimitive[];
}
Above you can see a simple outline of how the Grid class looks like. I decided to store my tiles inside a flat array, in opposition to the use of any complex objects or 2D array variants. This allows me to easier manipulate my tiles whenever I need it. And all the defined methods are only here to help. I hope their respective names explain what they do well enough (see the file in the repo for code), but, hopefully, a look at the TilePrimitive TS interface definition, will make it even clearer.
// grid.ts

interface TilePrimitive {
  x: number;
  y: number;
  id: string;
  value: number;
  merged: boolean;
  changed: boolean;
}
TilePrimitive is an interface used to represent the data behind any given tile on the board (which are actually Vue components). x and y store the “position” of the tile, which varies from 0 up. In this way, tiles are much easier to manipulate, and the actual 3D position can be easily calculated later. The id is just that - a randomly generated ID, used for keying tiles during Vue list rendering. value indicates tile’s current value, so stuff like 2, 4, 8, 16 and etc. Finally, merged and changed are just flags, used to get information about changes done to the tile, after board is interacted with. It’s all these individual properties that are used and manipulated by Grid’s methods.
The other file - manager.ts - defines the BoardManager class, used to actually handle all tiles-related operations. It’s used directly by Board Vue component and, on its own, makes use of previously defined Grid class. Here’s how it look like.
// manager.ts

//...
enum Direction {
  'down',
  'right',
  'up',
  'left',
}

export default class BoardManager {
  private size: number;

  private grid: Grid;

  constructor(size: number) {
    this.grid = new Grid(size);
    this.size = size;
  }

  private generateTile(): void;

  private moveTiles(direction: Direction): void;

  resetTiles(): void;

  updateTiles(direction: Direction): void;

  getTiles(): TilePrimitive[];

  getBoardSize(): number;

  getMarginSize(): number;
}
Notice that there aren’t that many methods when compared to Grid. Again, they all have pretty descriptive names, so you can easily figure out which one does what. With that said, I’d like to discuss a method that’s, in my opinion, the most important there is - .moveTiles(). It’s used by .updateTiles(), called in the result of user’s action, and does pretty much everything related to moving tiles - that’s the tough part!
// ...
private moveTiles(direction: Direction) {
    switch (direction) {
      case Direction.up:
      case Direction.down: {
        const up = direction === Direction.up;
        this.grid.eachColumn((column) => {
          column
            .sort((tileA, tileB) => (up
                ? tileB.y - tileA.y
                : tileA.y - tileB.y)
            )
            .forEach((tile, index, tiles) => {
              if (tile.y !== (up ? this.size - 1 : 0)) {
                if (index === 0) {
                  this.grid.setTileY(tile, up ? this.size - 1 : 0);
                } else {
                  const previousTile = tiles[index - 1];
                  if (previousTile.value === tile.value) {
                    this.grid.merge(previousTile, tile);
                  } else {
                    this.grid.setTileY(
                        tile,
                        up ? previousTile.y - 1 : previousTile.y + 1
                    );
                  }
                }
              }
            });
        });
        break;
      }
      // ...
    }
    // ...
You can see that the method itself is mostly just one, big switch statement. With the help of TS Direction enum, we figure out in which direction tiles should be moved. What you see above is a preview of the up and down movement logic, while very similarly-looking right and left movement is handled in other cases. Then, we go through each column, sort it for easier use, and compare all received tiles to see whether they should be merged, moved or left in their current state. That’s pretty much the whole magic!
Vue part
To harness all written code, we create two new Vue components - Board and Tile. Board is added directly to the Scene and takes size property.
<!-- Scene.vue -->
<template>
  <div class="scene" ref="scene">
    <Board :size="4"/>
  </div>
</template>
Board.vue
Using Vue components in TS + Vue environment is something we’ve discussed in the previous post… but there’s a new challenge! - a prop! Let’s start a quick overview of Board.vue!
<template>
  <div>
    <Tile
      v-for="tile in manager.getTiles()"
      :key="tile.id"
      :x="tile.x"
      :y="tile.y"
      :value="tile.value"
    />
  </div>
</template>

<script lang="ts">
// Board.vue

import { Component, Prop, Vue } from 'vue-property-decorator';
// ...

enum Edge {
  'bottom',
  'right',
  'top',
  'left',
}

@Component<Board>({
  components: {
    Tile,
  },
  mounted() {
    this.generateBoard();
    this.startGame();
  },
  destroyed() {
    this.$parent.scene.remove(this.object3D);
  },
})
export default class Board extends Vue {
  @Prop({ type: Number, default: 4 })
  private size!: number;

  private manager = new BoardManager(this.size);

  object3D!: THREE.Mesh;

  $parent!: Scene;

  private generateBoard(): void;

  private generateEdges(): void;

  private startGame(): void;

  private endGame(): void;

  getBoardSize(): number;

  getMarginSize(): number;
}
</script>
Let’s break it down! Going from the bottom, we create our class-based Vue component. We set up our mounted() and destroyed() hooks to do their job (basically just Three.js stuff). Inside our class component, you see a new property being defined - size - with special @Prop decorator applied to it. In this way, size is still type-safe, while serving as a prop at the same time! Moving on, we instance our BoardManager class, define a few class members for later use, and declare our methods!
The “public” ones - .getBoardSize() and .getMarginSize() are straight-up passing the values received from BoardManager, for easier access by Tile components. Next, .generateBoard() and .generateEdges() are creating the Meshs for our 3D board.
// ...
private generateBoard() {
    this.$nextTick(() => {
      this.object3D = new THREE.Mesh(
        generateBoardGeometry(this.manager.getBoardSize()),
        boardMaterial,
      );
      this.$parent.scene.add(this.object3D);
      this.generateEdges();
    });
}
// ...
Because .generateBoard() depends on $parent property, we need to first wait for the parent to be mounted. For that, we use Vue-provided .nextTick() method, which executes the provided callback at DOM next update cycle (i.e. after the parent is mounted). From there, we generate our base mesh and proceed to generate the board’s edges.
// ...
private generateEdges() {
    const boardSize = this.manager.getBoardSize();
    const marginSize = this.manager.getMarginSize();
    const edgeGeometry = generateEdgeGeometry(boardSize, marginSize);
    for (let i = 0; i < 4; i += 1) {
      const mesh = new THREE.Mesh(edgeGeometry, boardMaterial);
      mesh.rotation.y = (Math.PI / 2) * i;
      switch (i) {
        case Edge.bottom: {
          mesh.position.z = -(boardSize / 2 + marginSize);
          break;
        }
        // ...
        default:
          break;
      }
      this.$parent.raycaster.on('pointerdown', mesh, () => {
        this.manager.updateTiles(i);
      });
      this.object3D.add(mesh);
    }
  }
// ...
After generating our board’s edges, we need to correctly position them. For this, we use simple rotation and position properties, combined with for loop and switch statement. After that, we use our Raycaster instance (available from the Scene component - parent) to listen for events related to edge’s interactions. Now, usual 2048 handles such things with arrows or swipes, but, as we’re using the OrbitControls, and user can navigate the scene, there’s no easy way to detect board/OrbitControls interaction difference. So, because we’re focused mainly on the board today, I came up with this edge-based idea. Naturally, I’ll try to think of something better later on. If you’ve got any ideas - let me know in the comments!
Finally, .startGame() and .endGame() are scheduled for later. Right now they only call BoardManager’s .resetTiles() to start the game correctly.
Tile.vue
I hope you noticed the loop inside Board’s Vue template. It’s where all our tiles get “render”. Thanks to Vue reactivity, the only thing we need to care about is setting up a few lifecycle hooks and stuff inside our Tile component.
// Tile.vue

import anime from 'animejs';
// ...

@Component<Tile>({
  mounted() {
    this.$nextTick(() => {
      // ...
    });
  },
  destroyed() {
    this.$nextTick(() => {
      // ...
    });
  },
})
export default class Tile extends Vue {
  @Prop({ type: Number, required: true })
  private x!: number;

  @Prop({ type: Number, required: true })
  private y!: number;

  @Prop({ type: Number, required: true })
  private value!: number;

  private object3D = new THREE.Mesh(tileGeometry, tileMaterial);

  private animation?: anime.AnimeInstance;

  $parent!: Board;

  @Watch('x')
  onMoveX() {
    this.onMove();
  }

  @Watch('y')
  onMoveY() {
    this.onMove();
  }

  @Watch('value')
  onValueChanged() {
    const num = this.object3D.children[0] as THREE.Mesh;
    num.geometry = generateNumGeometry(this.value);
  }

  private onMove() : void;

  private getPosition(): {x: number, y: number};
}
Tile.vue is probably the simplest part of our code-base. The only “complex” and new thing here is the use of @Watch decorator. It’s used simply to indicate the right handler method for watched properties. You can see it in action in the above snippet. We still have to set up the prop first (like value), but then, we just pass the name of our prop to @Watch decorator and apply it to special handler method. Done!
So, with @Watch we watch for changes in tile’s x, y position and its value. change in value requires simple geometry swap. changing x y is handled by the same .onMove() method.
private onMove() {
    const newPosition = this.getPosition();
    this.animation = anime({
      targets: this.object3D.position,
      easing: 'easeInQuad',
      elasticity: 0,
      duration: 250,
      complete: () => {
        this.animation = undefined;
      },
      x: newPosition.x,
      z: newPosition.y,
    });
}
.onMove() retrieves the new position for tile with .getPosition() which uses passed props. It’s that method that converts our 0-based tile coordinates to something that will be used inside our 3D scene - nothing interesting. Then, we use Anime.js to smoothly animate the position to the new one. Have you noticed the animejs import in the previous snippet? Anime.js is a very good and simple library with perfect documentation. Check it out and you’ll know how to use it right away!
Inside our lifecycle hooks, with .$nextTick() assurance, we do nothing more than removing/adding tile’s Object3D, together with some additional scale animations.
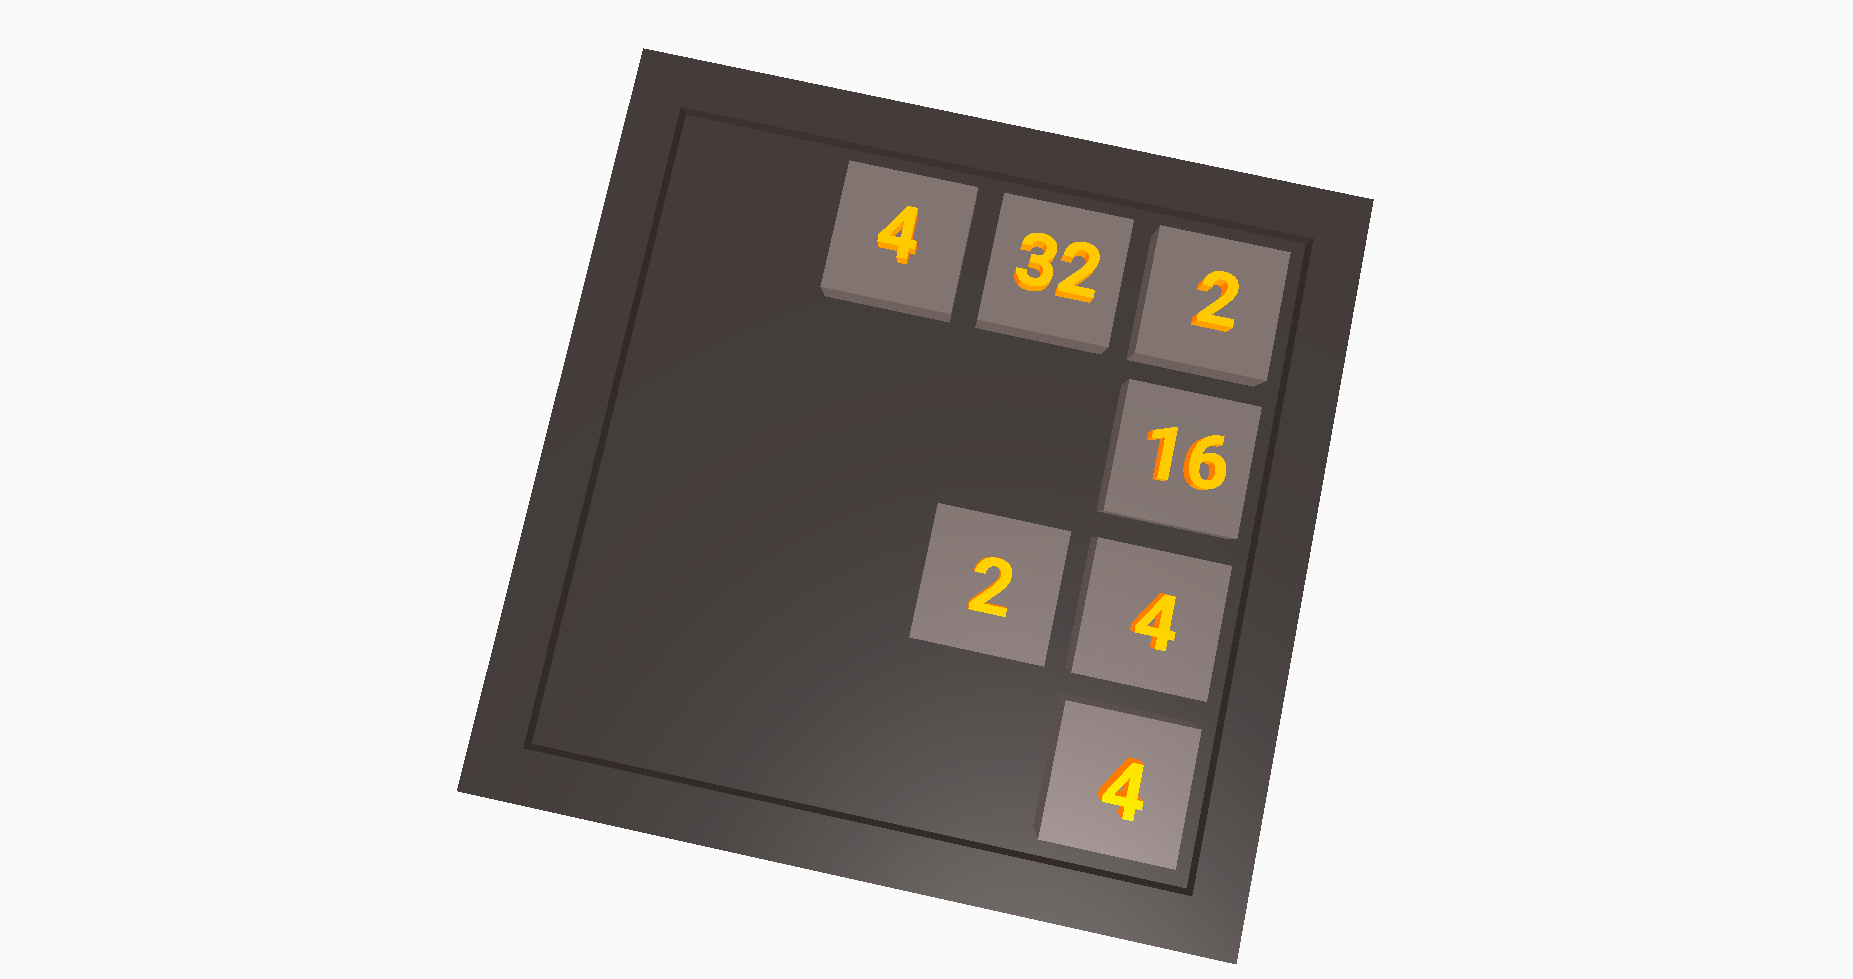
Results!
So, maybe we haven’t covered every last bit of code and this isn’t too much beginner-friendly kind of content, but I hope I managed to cover at least the most important parts. For the rest, remember to check out the GitHub repo. Anyway, here’s a preview of the long-awaited results!
Now go and put it to the test!
What’s next?
So, as I previously mentioned, today we’ve managed to do the hardest part of this project. Of course, there’s a lot more to do and a lot more room to improve! But, let’s take a break now - a deserved one! As always, let me know what you think about this article in the comments section or with a reaction below, and consider following me on Twitter, on my Facebook page or through my weekly newsletter for more up-to-date content. That’s all for now, and I hope you have a great day!
If you need
Custom Web App
I can help you get your next project, from idea to reality.